
Pit Excavation Boundary
To access this screen:
-
Activate the Home ribbon and select Boundaries >> Pit Excavation.
-
Run the command
survey-boundary-pit. -
Activate any 3D window and use the quick-key combination
sbp.
You may want to constrain cut and fill volume reporting for EOM reports such as Pit Actual, Compliance to Plan, or Compliance to Design so that only data within a limiting boundary is included. In Studio Survey, this is done by using pit excavation boundary strings. EOM cut and fill data can be limited by using single or multiple closed strings.
As boundaries change over time, each boundary string object, containing one or more strings, is added to the database against a reporting date.
You can use this screen in one of two ways, or in a combination of both:
- Digitize string data by using Pit Excavation Boundary and New, then add it to the database with the specified date label.
- Load previously created boundary data, highlight one or more boundaries, and add them to the database. These are added with the current Survey Date context.
String data associated with the same Survey Date is available for selection when you run an EOM report and select that survey date.
Example:
The image below shows a Previous and Current surface indicating excavation in the current reporting period. For the upcoming report, only changes within a specific area are relevant:
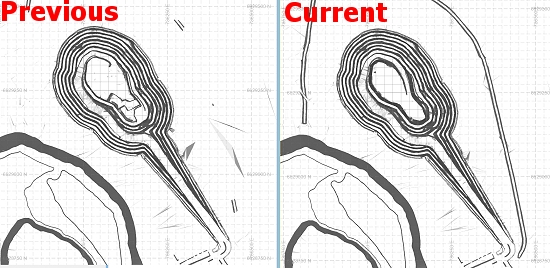
The area outside the pit rim is not relevant. Only cut and fill results within the pit are needed. One way to constrain results is to digitize or import a boundary string around the pit rim in plan view.
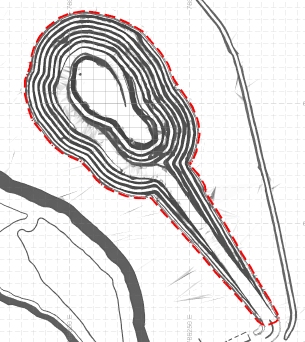
- To digitize a new boundary and assign it to the database, click New, digitize the boundary, and ensure it is selected and highlighted. Then click Add Selected to add it to the current database by using the specified Survey Date.
- Alternatively, load existing boundary data, highlight it in a 3D window, and click Add Selected.
For example:
Note: You can quickly generate a pit excavation boundary at a fixed elevation by using the Surfaces ribbon command Plane >> Section. This can generate a string at the intersection of the pit shell with a default section direction, or the current section definition.
Activity steps:
- Confirm the target reporting context by checking Current Pit and Current Area.
- If required, update Current Pit by using its browse control.
- Select the required Surveyor from the available list of surveyors in the database.
- Set the Survey Date that the boundary data represents.
- If you are creating new boundary data, click New in Pit Excavation Boundary and digitize the boundary in a 3D window.
- Select and highlight the boundary string data that you want to store in the database.
- Click Add Selected to add the highlighted string data to the database and associate it with the current Survey Date.
Related topics and activities